Posts Tagged ‘Recipes’

Homemade Whole Wheat Lasagna

April 27, 2010

I think if there’s anything that we could get everyone in the whole world to agree on, it’s that lasagna is good. Garfield really knew what he was talking about. (OK, so some people are allergic to wheat, but there’s gotta be a gluten-free version of it out there somewhere.) Am I right?

Lasagna has become somewhat of a staple in our house as of late. Josh loves lasagna and I’ve discovered it’s actually really easy to make as long as I keep some ricotta cheese in the fridge. Even as leftovers it’s a favorite.

Another thing I’ve discovered is that making your own lasagna noodles is really easy and worth it because you avoid the hassle of pre-cooking it and it cuts down on the baking time a lot. Plus since we try to incorporate our own whole wheat flour into everything we can, making our own whole wheat pasta is perfect. And probably healthier than store-bought pasta, although I couldn’t tell you exactly why off the top of my head. I’ll have to research that for you sometime.

So… here’s the step-by-step on making your own whole wheat lasagna. (This recipe is based off of the one in the Better Homes and Gardens Cookbook but I didn’t follow it exactly.)

Here’s two cups of flour and some basil and a dash of salt. (I use a really tiny pan to make my lasagna because I’m only feeding two people. If you’re using a normal sized pan, you’ll probably want to double or triple the quantities.)

Stir it all together and make a well in the center.

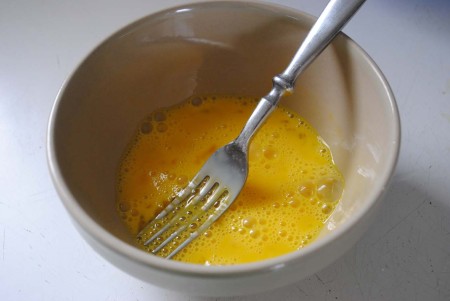
Now take two beaten eggs in a separate bowl…

…and mix in 1/3 cup of water and a teaspoon of oil.

Add the egg mixture to the flour mixture and mix it all together.

I usually mix it with a fork until I can’t anymore, then use my hand to combine the rest of it. There was way too much flour in it so I threw out the extra flour that I couldn’t get mixed in. The dough was just getting too hard.

See how solid that dough is? Pasta dough is supposed to be pretty dense, but I think I went a little overboard. Try starting out this recipe with a cup and half of flour instead of two. When you’re using whole wheat flour, you usually don’t need to use as much as you would with all-purpose flour.

Cover and let it rest for 10 minutes. I don’t know how necessary this step is but I did it anyway.

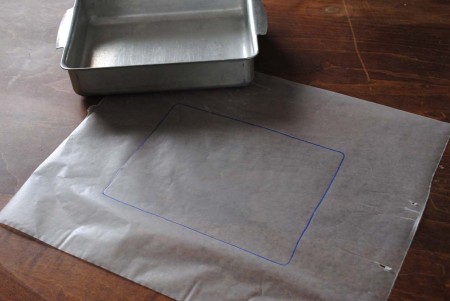
In the meantime, I traced my lasagna pan onto some wax paper to use as a guide when rolling out the dough.

I usually use three layers of pasta in my lasagna, so I divided the dough into three pieces.

Place your prepared wax paper ink side down on the counter and get ready to roll out your first layer.

***Warning: if you used permanent marker, you may get permanent marker ink all over your counter top.

Roll out your pasta dough with a rolling pin until it covers all the lines. The dough is pretty hard so this step is a pain in the butt. If you have a pasta maker consider yourself very, very lucky.

Trim the excess with a butter knife.

Repeat this process until you have as many lasagna sheets as you want.

Here are my three pretty lasagna sheets!

Now just assemble your lasagna using your favorite recipe and bake it in the oven at 375 degrees for 45 minutes. I did 400 degrees for just 30 minutes because I was in a hurry and it turned out just fine. (But my pan is tiny. If you’re using a normal sized lasagna pan you might not get away with just 30 minutes.)

And there you have it! I think the whole wheat gives the dish a lot more substance and extra flavor.

Don’t be afraid to make your own pasta. All you need is flour, egg, water, and oil… it’s impressive and it saves money 🙂

Banana Won Tons

March 26, 2010

Banana won tons. I just made up the name for the post title’s sake and I’m not sure how much I like it. If you can think of a better name for these things, be my guest.

My momma made these up one day and they’ve been hanging around the family ever since.

These are seriously sooo good, AND they are the easiest things to make. Ever. (Almost.)

You only need three ingredients:

Cinnamon, ripe (or overripe) bananas, and won ton wrappers.

OK, so you also need a little bit of cooking oil and water. If you don’t have those things, you seriously need to go grocery shopping. And please move to a location where water is readily available to you so you don’t die.

Start out by breaking the bananas into pieces into a bowl. How many bananas you use depends on how many banana won tons you want to end up with in the end. I used two because that’s all I had.

Mash them up with a fork.

Sprinkle in as much cinnamon as you think you should. I probably used about a tablespoon of it. But I really like cinnamon.

Mix it all together into a brown, gooey mess.

Now, get some won ton wrappers ready.

You’ll also want a small container of water on the side.

Take one sheet…

…and spoon (or fork) some of the banana mixture onto it. Just use the fork you used to mash up the bananas, OK? There’s no need to dirty a spoon too. Unless you really like washing spoons. Then by all means, use as many spoons as you want.

Now we’re going to roll it up like a little tiny egg roll. Or burrito. Whichever one you relate to more.

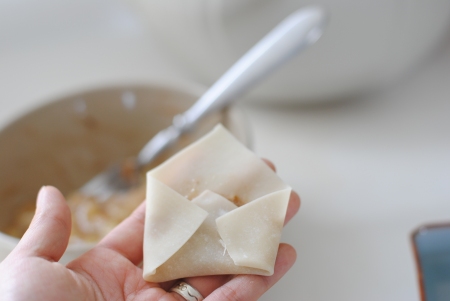
Fold up the bottom corner,…

…fold in the sides,…

…then roll it up the rest of the way. Remember that little container of water? Dip a finger into it and dab some water onto the last (top) corner before you roll it up completely. This seals it up really nicely.

Continue making these little rolls until you either a.) run out of banana filling or b.) run out of won ton wrappers. Or, if you’re my mom, you c.) run out of both at the exact same time.

As for me, I ran out of banana filling. If this happens to you, make sure you store the rest of the wrappers in an airtight container. If you don’t, I promise you, you will have stale won ton wrappers the next day. These wrappers are a great thing to have around. You can fill them with anything you have left over, fry them, and people will think you’ve made something fancy.

Now, pour a thin layer of cooking oil into a frying pan and turn on the heat. I used canola oil.

When the oil is hot, drop as many rolls as you can fit into it. You know it’s hot enough if the oil sizzles. Turn the heat down pretty low; these things cook pretty quickly.

When they start to turn golden brown underneath flip them over with some chopsticks.

Mmm, those really brown ones on the left look really good.

They’re finished when both sides are golden brown. Place the finished rolls on a plate lined with paper towels to soak up the excess oil. We just barely ran out of paper towels so I used a tea towel instead.

Finish cooking the rest of the rolls.

Make sure you let them cool for a few minutes, especially if you have a husband like mine who always forgets to blow on things before he puts them in his mouth. But also try to eat them soon because they start losing their crispiness after a while.

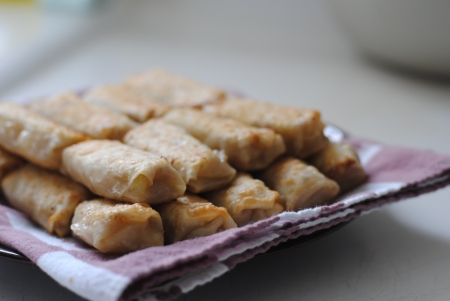
And there you have it! So easy, right? And always a crowd pleaser.

Try them today!

Plain White Japanese Rice

March 12, 2010

There are a lot of things I’ve learned from my momma and I think one of the most important of those things is how to make good, plain Japanese rice. Since Japanese food is pretty trendy these days I thought I’d share my knowledge with you, just to make sure you’re getting the real good stuff. There’s tons of delicious rice in the world… I love jasmine and basmati for Thai and Indian curries. But nothing beats a bowl of delicious, high-quality, white rice when you’re going plain. All the flavor and deliciousness is already there; it doesn’t need any help from any spices or condiments. That’s Japan for ya… finding beauty in simplicity.

To get the best rice, you have to start with the best stuff. If you are lucky enough to have an Asian grocery store near you, you might be able to get your hands on some really high-quality rice. They can get pretty pricey, but trust me, if you’re willing to shell out the money, the quality and flavor of the rice is well worth it. I could eat this stuff all day long.

These grains are like precious pearls.

However, if you’re like me and the only store near you is a Wal-Mart, you’ll have to settle for this:

It’s not amazing, but it works.

So this is how to do it. Get out your rice cooker and your rice cup.

This is one rice cup of rice. Most rice cookers come with one of these… do not ever lose your rice cup! The reason why is that one rice cup of rice…

…does not equal one normal cup, as you can see above.

Pour the desired amount of rice into the rice cooker pot. I did two rice cups full.

Now’s the important part. We need to wash the starchiness away from the grains. This makes the rice really nice and shiny and fluffy in the end.

Fill the pot partway with warm water straight from the faucet…

…then stir everything around with your hand until the water gets all white and cloudy.

Carefully pour out the cloudy water, trying not to lose any of the rice. I usually shield the rice with my other hand and let the water drain through my fingers, but I needed that hand to hold the camera with this time. Also, I don’t usually do everything left-handed.

Now briskly stir the rice around with your hand to rub the grains together. It should sound like shakka shakka shakka. That’s just the way my momma taught me.

Repeat the rice washing process until the water is clear enough to see the individual rice grains through it. I usually call it good after I’ve washed it three times.

See?

Fill the pot up with water up to the line that corresponds with the number of rice cups of rice you poured in. If you look closely at the above picture, you can see that my water line goes up to the “2” because I used two rice cups of rice.

*Warning: Make sure you’re looking at the side of the pot that says “Other Rice.” Usually the other side says “Brown Rice,” and the water levels are a little bit different for that.

Now place the pot inside of the rice cooker but hang on! Don’t turn it on yet. Don’t even plug it in yet. You need to let the rice rest for 15 to 30 minutes. I promise it’s worth it.

Once you’re finished letting the rice chill out, plug it in and turn it on. My rice usually takes about 20 minutes to cook. This is a good time to work on your other entrées.

Warning: While the rice is cooking, do not, under any circumstances, lift the lid to check on it or stir the rice. The pressure of the steam that builds up under the lid is crucial to the cooking process. If you can’t control your curiosity, get a rice cooker with a clear lid.

My momma always told me to make sure the steam blow hole isn’t right under the cabinets. This is to preserve the life of your cabinets.

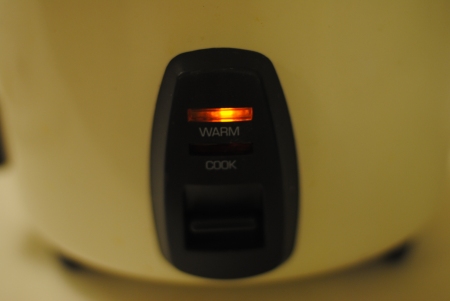
When the rice is done cooking you’ll hear the switch pop back up. Or if you have a fancier machine than mine, it might sing and dance or something. But don’t get too excited and lift the lid off right away! The rice turns out even better if you leave the lid on and let the rice sit for another 15 minutes.

After 15 minutes, you can finally take the lid off. It should look fluffy and smell delicious.

Get your rice paddle out to stir your rice around a bit. You’ll want to stir it around at this point even if you’re not ready to eat it yet. This is so you don’t get parts that are crispy and parts that are soggy. See the golf-ball-like dents all over mine? That helps the rice not stick to the paddle as much. My momma got it for me. It also makes great gnocchi. I’m serious.

Stir, don’t mash, the rice around. You want to keep it light and fluffy. Just scrape the bottom and turn it over a few times.

Now it’s ready to serve! Turn this into a staple at your house and you’ll save money and eat healthily. All you have to do is prepare some small and simple side dishes to go with it each time.

Rice doesn’t store in the fridge very well, so this is what I do with the leftover rice: take pieces of Saran Wrap and wrap up single portion sizes of rice, then freeze them. Then, whenever you want to eat rice, take out a portion and heat it up in the microwave for a few minutes.

Good luck!

Happy Girls’ Day! (Plus Kasutera)

March 3, 2010

Today is actually a pretty big holiday in Japan called Hinamatsuri, or Girls’ Day. People who have daughters celebrate by setting up these fancy displays of Hina Ningyo, which are these fragile dolls representing the emperor, empress, and various attendants. Here’s my parents’ set:

They only have the emperor and empress because the rest of the dolls are still in Japan, and they are just too heavy, expensive, and breakable to transport easily. I have no idea who the little girl is but she’s cute, huh? Girls’ Day is kind of a fun holiday in my family because there are five daughters.

Since I’m also about to have a daughter (!!!) I wanted to do something to celebrate, too. We obviously don’t have a hina ningyo set, but another way people celebrate the holiday is to eat good food (duh!) And Japanese people really know how to eat good food.

The problem is, a lot of the ingredients I need to make most of the really yummy Japanese desserts aren’t readily available here in this desert called Southern Utah. But I did find a simple-enough-looking recipe for a delicious cake called kasutera here, so the dessert-making was on!

I didn’t take step-by-step pictures of me making it because I wanted to try it out first and see if it’s actually a good recipe. Also, the camera was low on batteries. There wasn’t much to worry about though, the cake turned out DE-LI-CIOUS.

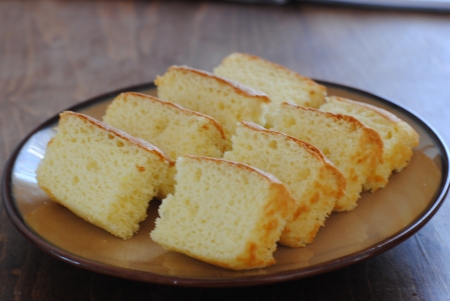
The recipe was a little fancier than my usual cooking/baking consists of, but not too bad. You have to separate eggs, sift things (which I skipped because, remember, I don’t have a sifter), fold gently, stuff like that. It was definitely worth it. Even in our little toaster oven, the cake rose beautifully and turned out super light and fluffy with an awesome crinkly brown top. It tastes like fluffy custard because of all the eggs in it.

The kasutera I remember loving when I was younger actually had a finer texture, which can probably be remedied by using cake flour like the recipe calls for instead of just regular flour like I used. Sifting it probably helps too. Some day when I’ve really perfected it, I’ll post the recipe up here with lots of pictures.

**Update: I just talked to my mom and she told me that my kasutera looks really good (yay!), which means a lot because she’s, like, a real Japanese person and her kasutera is what I remember from my childhood. She also told me that she already took down the hina dolls display because it’s bad luck to leave it up past Girls’ Day if you have any daughters who are still unmarried. Just thought I should give you a heads up in case any of you were planning on keeping yours up ’til later…

In case you missed the link above (like my mom), here’s where you can find the recipe: Kasutera Recipe.

Whole Wheat Lemon Poppy Seed Mini Muffins

February 26, 2010

The sad truth is we don’t have a working oven here at Trailer 29. We kind of have one, but Josh accidentally snapped the knob off of it during the hullabaloo of tearing and fixing the whole place up, as you can see below.

No knob 😦

Honestly though, I don’t think I would use this oven even if it did work. We just like to keep it closed and pretend it’s not there.

Not having an oven is sad because a.) I love to bake, and b.) Josh is pretty much Cookie Monster reincarnate. But we also know that newlyweds aren’t supposed to start out with everything they could possibly need so we’re happy to work up to getting a new oven someday. It will be a joyous occasion. Tears will be shed.

Luckily for us, we have this little toaster oven, which is a gift from my sister-in-law. And guess what?

It has a “bake” setting. So actually, I can bake small batches of stuff. We’re not completely deprived of baked goodies after all!

The other day I scored these rad mini muffin pans at D.I., fifty cents for the set. The perfect size for a tiny oven. I also bought a thing of poppy seeds recently which I’ve been really eager to use. So today seemed like a good day to try making some lemon poppy seed mini muffins. (I think mini is better anyway. Big muffins are such a commitment to eat sometimes.)

So here are all the dry ingredients: whole wheat flour, all-purpose flour, sugar, baking powder, salt, and poppy seeds.

We’re really into grinding our own whole wheat flour here and we try not to touch the white stuff if we can help it, but whole wheat flour tends to be really heavy, and for recipes that need to turn out light and fluffy in any way, I have no choice but to partially use white flour. Don’t tell Josh it’s in there… he might not like these as much if he knew.

If I had a sifter, and if I cared, I would probably sift all of these ingredients together first (minus the poppy seeds.)

As it stands, however, I just stirred it all together with a fork.

Now break an egg into a separate bowl…

…and beat the crap out of it with a fork. (Yes, I read The Pioneer Woman, and it’s hard not to be influenced by her.)

I just used the same fork I used to stir the dry ingredients together. The fewer forks you have to wash in the process, the better.

Now add milk, canola oil, and lemon juice. There happened to be one lemon wedge left over in the fridge from a taco dinner we had a little while ago, so I zested some of the peel into it as well. Sometimes I try to be all fancy like that.

Mix all the wet ingredients together and dump them into the dry mixture.

Then mix everything together until combined. Yes, with that same fork still.

Use a cookie scoop to fill the greased muffin pans (if you don’t have a cookie scoop yet, you really need to go get one ASAP, OK? You’ll love your life so much better.) Now throw them into a 400 degree oven (how the heck do you make the degree sign on the keyboard?) for 10 minutes.

In the meantime, wash your dirty dishes. My momma always told me that you’re not a good chef unless you clean as you go.

Watch your beauties rise in the oven. This is one of my favorite pastimes; better than any TV show.

OK, these are actually a little too done. For the next batch, I’m taking it down to 375 degrees.

Perfect!

And really really yummy. The perfect size too (for disappearing much too quickly.)

I hope you all enjoyed my first attempt at step-by-step photographing/explaining a recipe. It was actually kind of fun. And helps me bond with our camera a little more.

Here’s the recipe:

Whole Wheat Lemon Poppy Seed Mini Muffins

1 cup whole wheat flour

3/4 cup all-purpose flour

1/2 cup sugar

2 teaspoons baking powder

1/4 teaspoon salt

1 tablespoon poppy seeds

1 egg

3/4 cup milk

1/4 cup canola oil

1 1/2 tablespoons lemon juice

optional: zest of lemon

1. In a medium bowl, stir all the dry ingredients together. Make a well in the center if you want; set aside.

2. In a small bowl, beat the egg, then add the rest of the ingredients. Mix it all together.

3. Pour the egg mixture into the flour mixture and mix until everything is combined.

4. Scoop the batter into greased muffin pans. Bake in a 375 degree oven for 10 minutes.

Makes about 32 mini muffins.